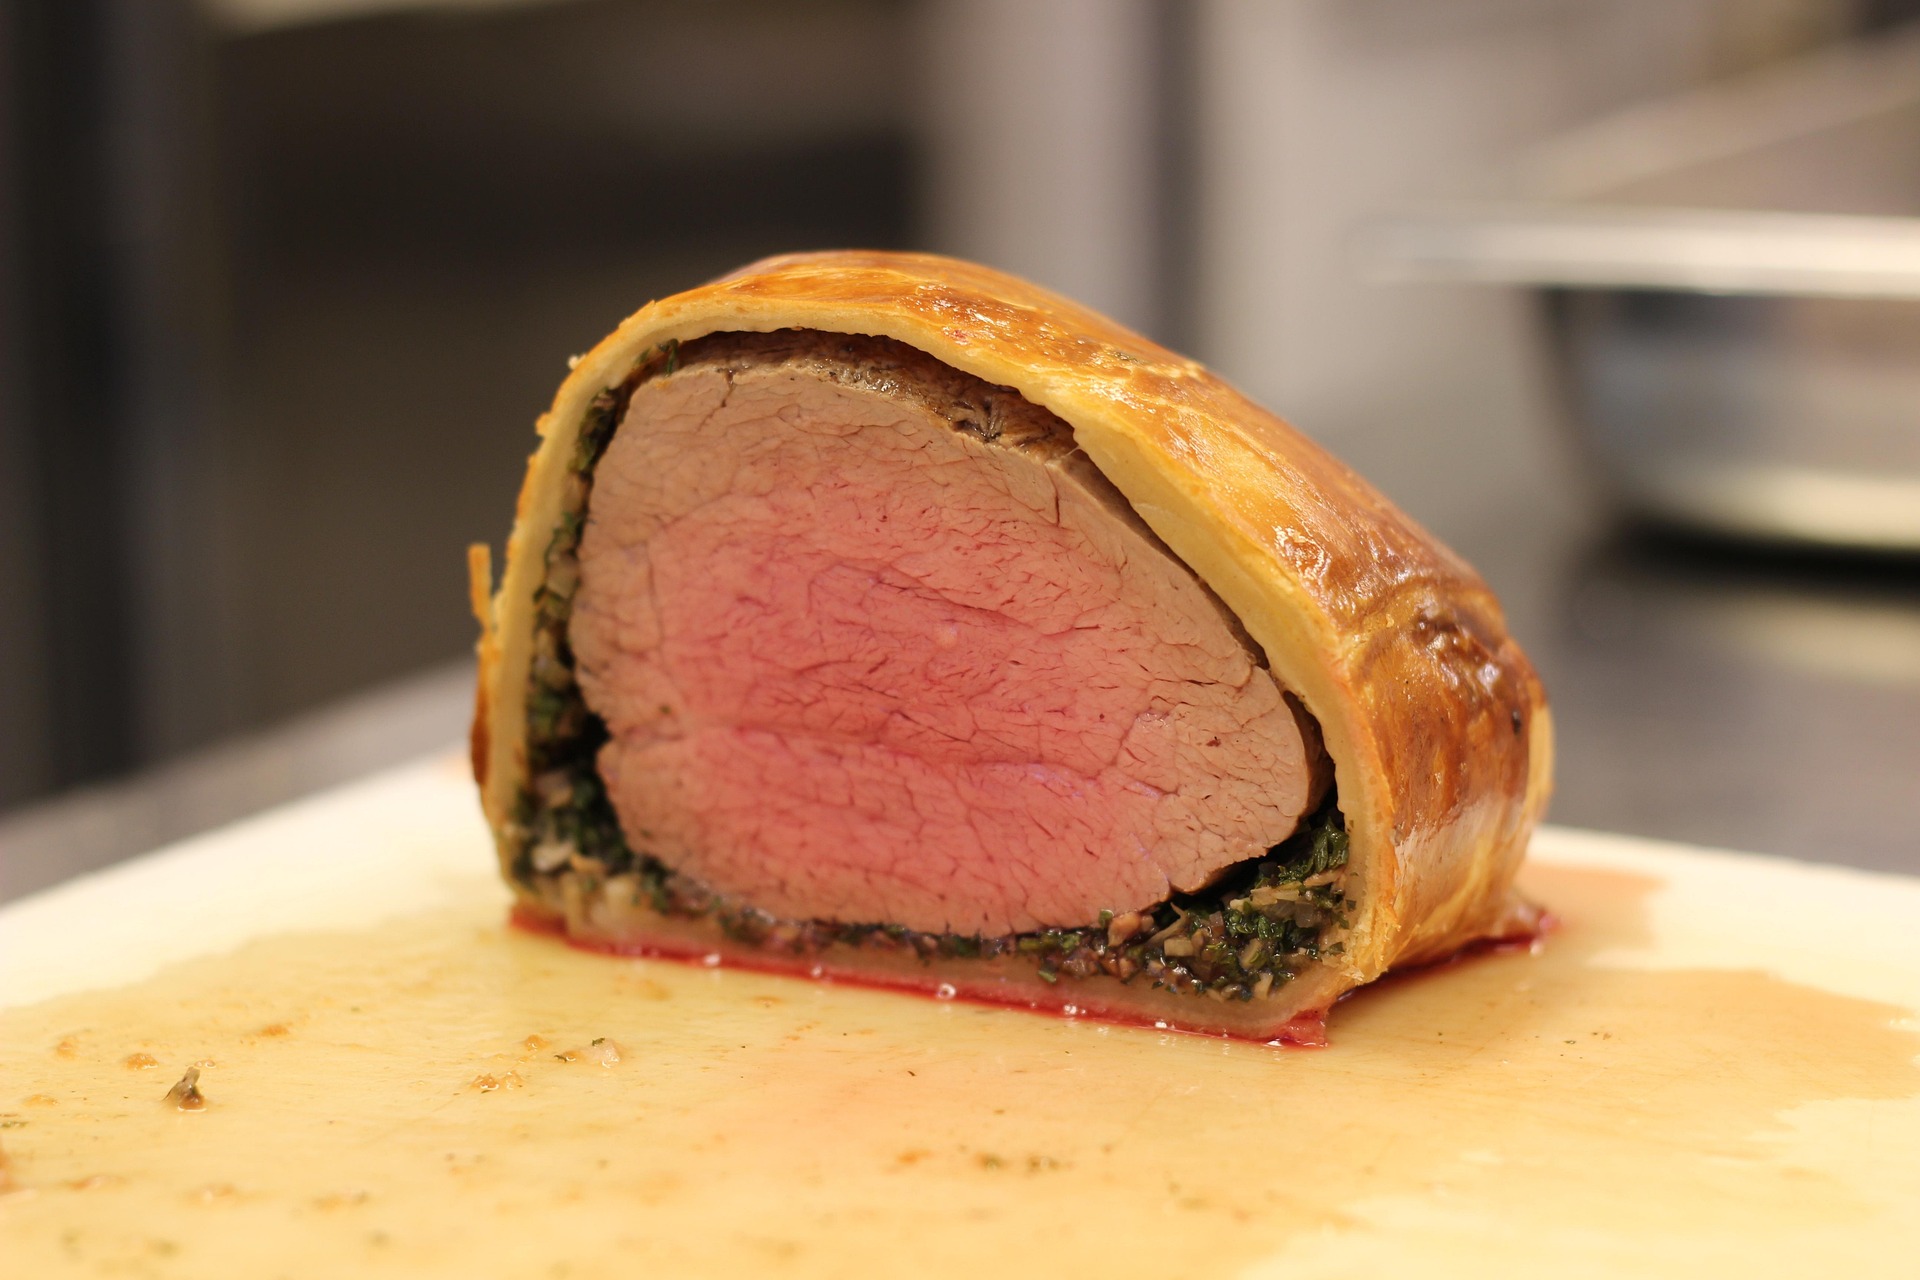
Cooking a Beef Wellington is a uniquely terrifying experience. You take a ridiculously expensive, beautifully marbled center-cut beef tenderloin, wrap it completely in layers of ham, mushroom paste, and dough, and throw it into a scorching hot oven. For the next 40 minutes, you are flying completely blind. You cannot touch the meat. You cannot see the meat. You just have to stare through the oven glass, praying that the pastry turns golden before the beef inside turns into grey, overcooked leather.
For years, I avoided making it. The stakes were simply too high. But after enduring one too many holiday dinners featuring dry turkeys and uninspired hams, I decided to tackle the beast. I ruined two Wellingtons before I figured out the secret.
The secret is not a magical oven temperature. The secret is architecture. A Beef Wellington is a structural engineering project, and its absolute worst enemy is moisture. If you don’t control the water content of your ingredients, your pastry will collapse into a soggy, gelatinous mess.
Let’s tear down the Wellington and rebuild it layer by layer, eliminating the risks and guaranteeing that perfect, medium-rare reveal.
Layer 1: The Foundation (Center-Cut Tenderloin)
You cannot use a tapered, uneven piece of meat for this. You need the absolute center cut of the beef tenderloin (often called the Chateaubriand). It must be a perfect, uniform cylinder so it cooks evenly from edge to edge.
Before it goes anywhere near the pastry, you must sear it. Get a heavy cast-iron skillet smoking hot with a little neutral oil. Drop the beef in. You are not trying to cook it; you are violently scorching the outside for exactly 60 seconds per side to trigger the Maillard reaction and build a crust.
The moment you pull the sizzling beef from the pan, brush the entire surface generously with sharp English mustard. The heat of the meat will open up the harsh mustard oils, mellowing them out and creating a spicy, tangy glue that will hold the next layer.
Critical Rule: Put the beef in the fridge immediately. It must be completely cold before assembly.
Layer 2: The Danger Zone (The Mushroom Duxelles)
This is where 90% of Wellingtons fail. The traditional filling that hugs the beef is a duxelles—a finely minced paste of chestnut mushrooms, shallots, garlic, and fresh thyme.
Here is the problem: mushrooms are basically sponges filled with water. If you wrap raw or undercooked mushrooms in pastry, they will steam in the oven, releasing all their water directly into your dough.
You must pulse your mushrooms in a food processor until they look like coarse dirt. Then, throw them into a dry pan over medium heat. Do not add oil or butter yet. Just cook them. You will watch in horror as pools of liquid seep out of the mushrooms. Keep cooking. Stir continuously until every single drop of moisture has evaporated and the paste begins to stick to the pan. Splash in a little dry sherry or cognac, cook that off completely, and season heavily. The result should be a dark, intensely earthy, completely dry paste.
Layer 3: The Insurance Policy (Prosciutto and The Crepe)
To keep the juices of the beef and the duxelles from reaching the pastry, we need a moisture barrier. Gordon Ramsay famously uses overlapping slices of Parma ham or Prosciutto. This works well, adding a thin layer of salty pork fat.
But I like to go one step further and use the classic Michelin-star trick: the chive crepe. Before laying down the ham, make a very thin, savory crepe (just flour, milk, egg, and chopped chives). Lay the crepe down on a sheet of plastic wrap, shingle your prosciutto slices over it, and spread an even layer of your cold mushroom duxelles on top.
Place your chilled beef in the center. Now, using the plastic wrap for leverage, roll the whole thing up into a tight, secure barrel. Twist the ends of the plastic wrap like a piece of candy to force it into a perfect cylinder. Put it back in the fridge for another hour to set the shape.
Layer 4: The Vault (Puff Pastry)
Do not make your own puff pastry. Life is too short, and all-butter commercial puff pastry is spectacular.
Roll your pastry out just enough to wrap your beef barrel. Unwrap the chilled meat, place it on the pastry, and roll it tightly. The seam goes on the bottom. If you want to be fancy, use a lattice cutter on a second sheet of pastry and drape it over the top. Brush the entire vault with a rich egg wash (egg yolks and a splash of heavy cream) to guarantee a deeply golden, lacquered finish.
Sprinkle with coarse flaky sea salt. Now—and this is non-negotiable—put the fully assembled Wellington back into the fridge for 30 minutes. The pastry must be ice-cold when it hits the hot oven, or the butter will melt out before the dough puffs.
The Crucible and The Reveal
Preheat your oven to 400°F (200°C) with a heavy baking sheet already inside. Sliding your cold Wellington onto a pre-heated tray immediately jump-starts the cooking of the bottom pastry, preventing the dreaded soggy bottom.
Bake it for 35 to 40 minutes. But do not guess. Use a digital meat thermometer. Pierce it straight into the very center of the beef. You are looking for an internal temperature of exactly 115°F to 120°F (46°C – 48°C).
When you pull it out, the pastry will be shattered and golden. But you cannot cut it. If you cut it now, the pressurized juices will violently flood out, ruining the pastry and leaving you with dry meat. You must let it rest on a wire rack for at least 15 minutes. The internal temperature will gently rise to a perfect 130°F (Medium-Rare).
When you finally take a serrated knife and slice through the center, the sound of the shattering pastry followed by the reveal of that glowing, ruby-red beef… it is one of the most rewarding sights in the culinary world. You didn’t just cook dinner. You engineered a masterpiece.